Nitro.js fixed my biggest issue with NodeJS deployment.
Deploying Node.js has always been painful. Node.js needs to be present on the server, you need to install dependencies on the server, etc. It has never been smooth, especially with native dependencies. To many, the answer was containerisation, but that is just a band-aid. In this article, we look at how Nitro.js solved this.
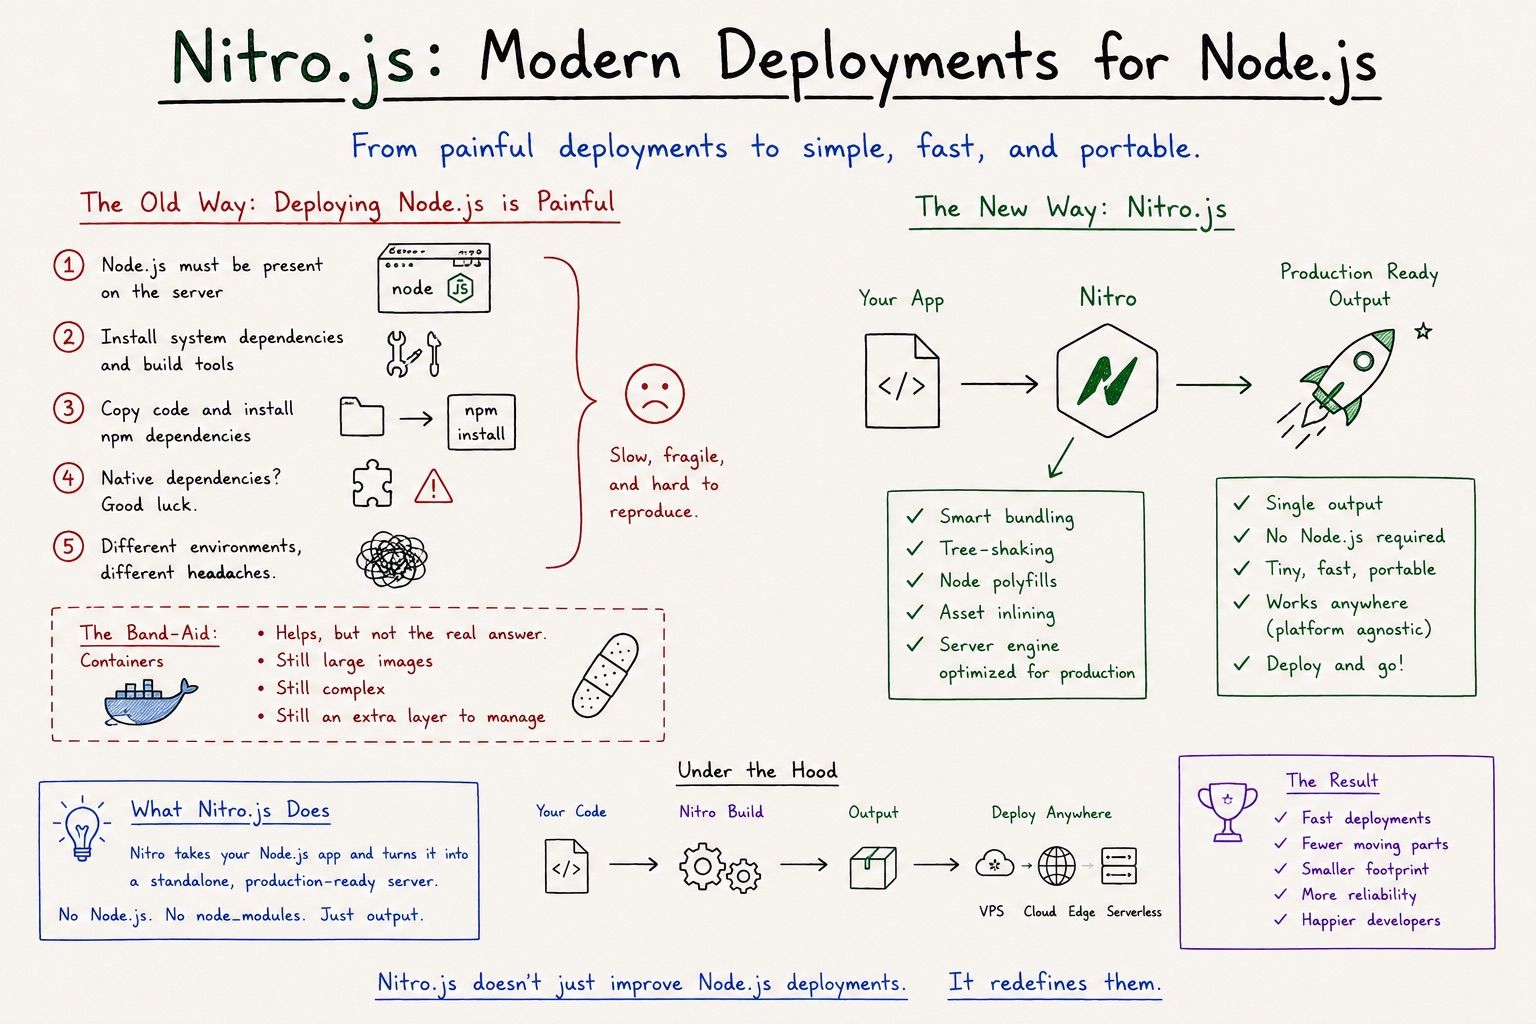
# What is Nitro?
If you have used Nuxt 3, you have used Nitro under the hood. It is the thing that powers the server side of Nuxt. That is what makes Nuxt.js a full-stack framework. Before Nuxt 3, you needed to pair Nuxt with a back-end framework for it to work. I wrote my thoughts on full-stack Nuxt here. I also made a video about it here is the link.
You can think of Nitro as the backend that powers Nuxt.js, but it does a lot more. In fact, it has its own website, and it is powering more than just Nuxt. To refine the definition, think of it as what Express.js would look like if it were designed in the modern era. And I mean this in every way. It still keeps the simplicity of Express but adds all the batteries you’ll probably need for your application. For instance, you’ll be able to use TypeScript without configuring TypeScript. All this without bloat. You can learn more about Nitro here.
# My biggest problem with Node.Js
Yes, I know Node.js is not a framework, so I’ll be more specific. I’ll use Express.JS for this. Express has many issues, like callback hell, poor TypeScript support, and more, but one that really hurt me was deployment.
This is how you typically deploy a Node.js application. I’m going to assume a VPS setup for this. The flow would look something like this:
- You push your code.
- CI picks it up and runs tests.
- Your CI then runs stuff on your VPS, like
git clone,npm install, then restarts your server.
This is not the only setup, but it illustrates the issue. The big issue here is that you have CI, but you need to run stuff on your machine too, wasting compute. You also cannot exactly copy node_modules from the CI since they are not guaranteed to work, and even if the machine is an exact copy, that will take forever.
# Why not just Docker?
Containerisation is a solution here. However, containerisation forces you to work in a certain way. You are now not in control of your deployment decisions. It starts with a simple container, then you need a private container service for your images, then you need some orchestration and then you’re deep into a world that was created for places like Google, not a 10-employee startup in Western Heights. Some fancy this, but I love going bare metal for as long as I can.
# So how did Nitro solve this?
When you run nitro build or nuxt build (with Nuxt SSR), Nitro bundles everything the application needs into a directory called .output. This contains everything your application needs to run. No more npm install in prod. It is kinda similar to WORA. Hey Java pips, I said kinda hehe.
# The anatomy of .output
.output/
├── public/          # All your static assets (images, CSS, JS)
└── server/
    ├── chunks/      # Code-split code chunks and server logic
    ├── node_modules/# ONLY native or explicitly excluded modules (often empty)
    └── index.mjs    # The absolute, standalone entry point
To run your application, all you need to do is;
node .output/server/index.mjs
Yes. That simple. No more dependency theatre.
# So how does Nitro achieve this?
Under the hood, Nitro uses Rollup and unjs/unimport to achieve this.
As for native deps, which have always been an issue with older Node.js versions. Native deps in Node.js are those that use C++ addons. These are automatically detected and moved to .output/server/node_modules/.
And that, ladies and gentlemen, is how Nitro made Node.js deployment more portable.
# So how does the deployment look like now?
The current setup with Nitro is as simple as;
- Do all the CI stuff
- Copy the .output directory into the server with Rsync.
Infact, that is how stanleymasinde.com is deployed. Here is how the current workflow looks like.
name: ci

on: push

concurrency:
  group: ci-${{ github.ref }}
  cancel-in-progress: true

env:
  NODE_VERSION: "26"
  DEPLOY_SERVICE: my-website.service
  DEPLOY_DIR: /var/www/stanleymasinde.com
  APP_PORT: “3000"

jobs:
  test-and-build:
    runs-on: ubuntu-latest

    steps:
      - name: Checkout
        uses: actions/checkout@v6

      - name: Install pnpm
        uses: pnpm/action-setup@v6

      - name: Install node
        uses: actions/setup-node@v6
        with:
          node-version: ${{ env.NODE_VERSION }}
          cache: pnpm

      - name: Install dependencies
        run: pnpm install --frozen-lockfile

      - name: Lint and typecheck
        run: |
          pnpm run lint &
          pnpm run typecheck &
          wait

      - name: Test
        run: pnpm run test

      - name: Build
        run: pnpm run build

      - name: Upload build output
        if: github.ref == 'refs/heads/main'
        uses: actions/upload-artifact@v4
        with:
          name: nuxt-output
          path: .output/
          retention-days: 1
          if-no-files-found: error
          include-hidden-files: true

  deploy:
    needs: test-and-build
    if: github.ref == 'refs/heads/main'
    runs-on: ubuntu-latest
    environment: production

    concurrency:
      group: deploy-production
      cancel-in-progress: false

    steps:
      - name: Download build output
        uses: actions/download-artifact@v4
        with:
          name: nuxt-output
          path: .output

      - name: Setup SSH
        env:
          IP_AND_USER: ${{ secrets.IP_AND_USER }}
        run: |
          mkdir -p ~/.ssh
          echo "${{ secrets.SSH_PRIVATE_KEY }}" | tr -d '\r' > ~/.ssh/id_rsa
          chmod 600 ~/.ssh/id_rsa
          SSH_HOST="${IP_AND_USER#*@}"
          ssh-keygen -F "$SSH_HOST" || ssh-keyscan -H "$SSH_HOST" >> ~/.ssh/known_hosts

      - name: Deploy to production
        run: |
          rsync -az --delete .output/ ${{ secrets.IP_AND_USER }}:${{ env.DEPLOY_DIR }}

      - name: Restart production service
        run: |
          ssh ${{ secrets.IP_AND_USER }} "sudo systemctl restart ${{ env.DEPLOY_SERVICE }}"

      - name: Verify deployment
        run: |
          ssh ${{ secrets.IP_AND_USER }} "sudo systemctl is-active --quiet ${{ env.DEPLOY_SERVICE }}"
          ssh ${{ secrets.IP_AND_USER }} "curl -fsS --retry 3 --retry-delay 2 --retry-all-errors http://127.0.0.1:${{ env.APP_PORT }}/"
To get how the SSH setup section works, read this article I wrote about it.
That’s it!
I hope you enjoyed reading. Let me know what you think.
- Email: [email protected]
- Twitter: https://twitter.com/StanleyMasinde_